It has been 2 months now working on and regrowing
my eyebrows. In the past, I have plucked endlessly, hoping to achieve a good
arch but well, these brows are truly Asian. Thankfully, the straight and thick
brows are now so “in” that I can regrow the eyebrows I was born with.
Now, depending on how much growth I have on my eyebrows, I
have to be honest that I still cannot quickly say how long it will take me to
finish my brows nicely. Sometimes it
takes me 10 minutes, and sometimes it can get to 30 minutes, yes! I can be a
little oily while doing my make up, I can also have some tiny growing strands
that won’t cooperate with the outline I am making, or I can also be having a
bad day and the eyebrows can feel really tough to do sometimes. Girl problems.
The kind that are too little to sweat about, but when you get your acts
together, you feel good all day just by staring at your nicely shaped brows.

Okay, enough with the girl talk: What are my major
requirements for shaping my brows?
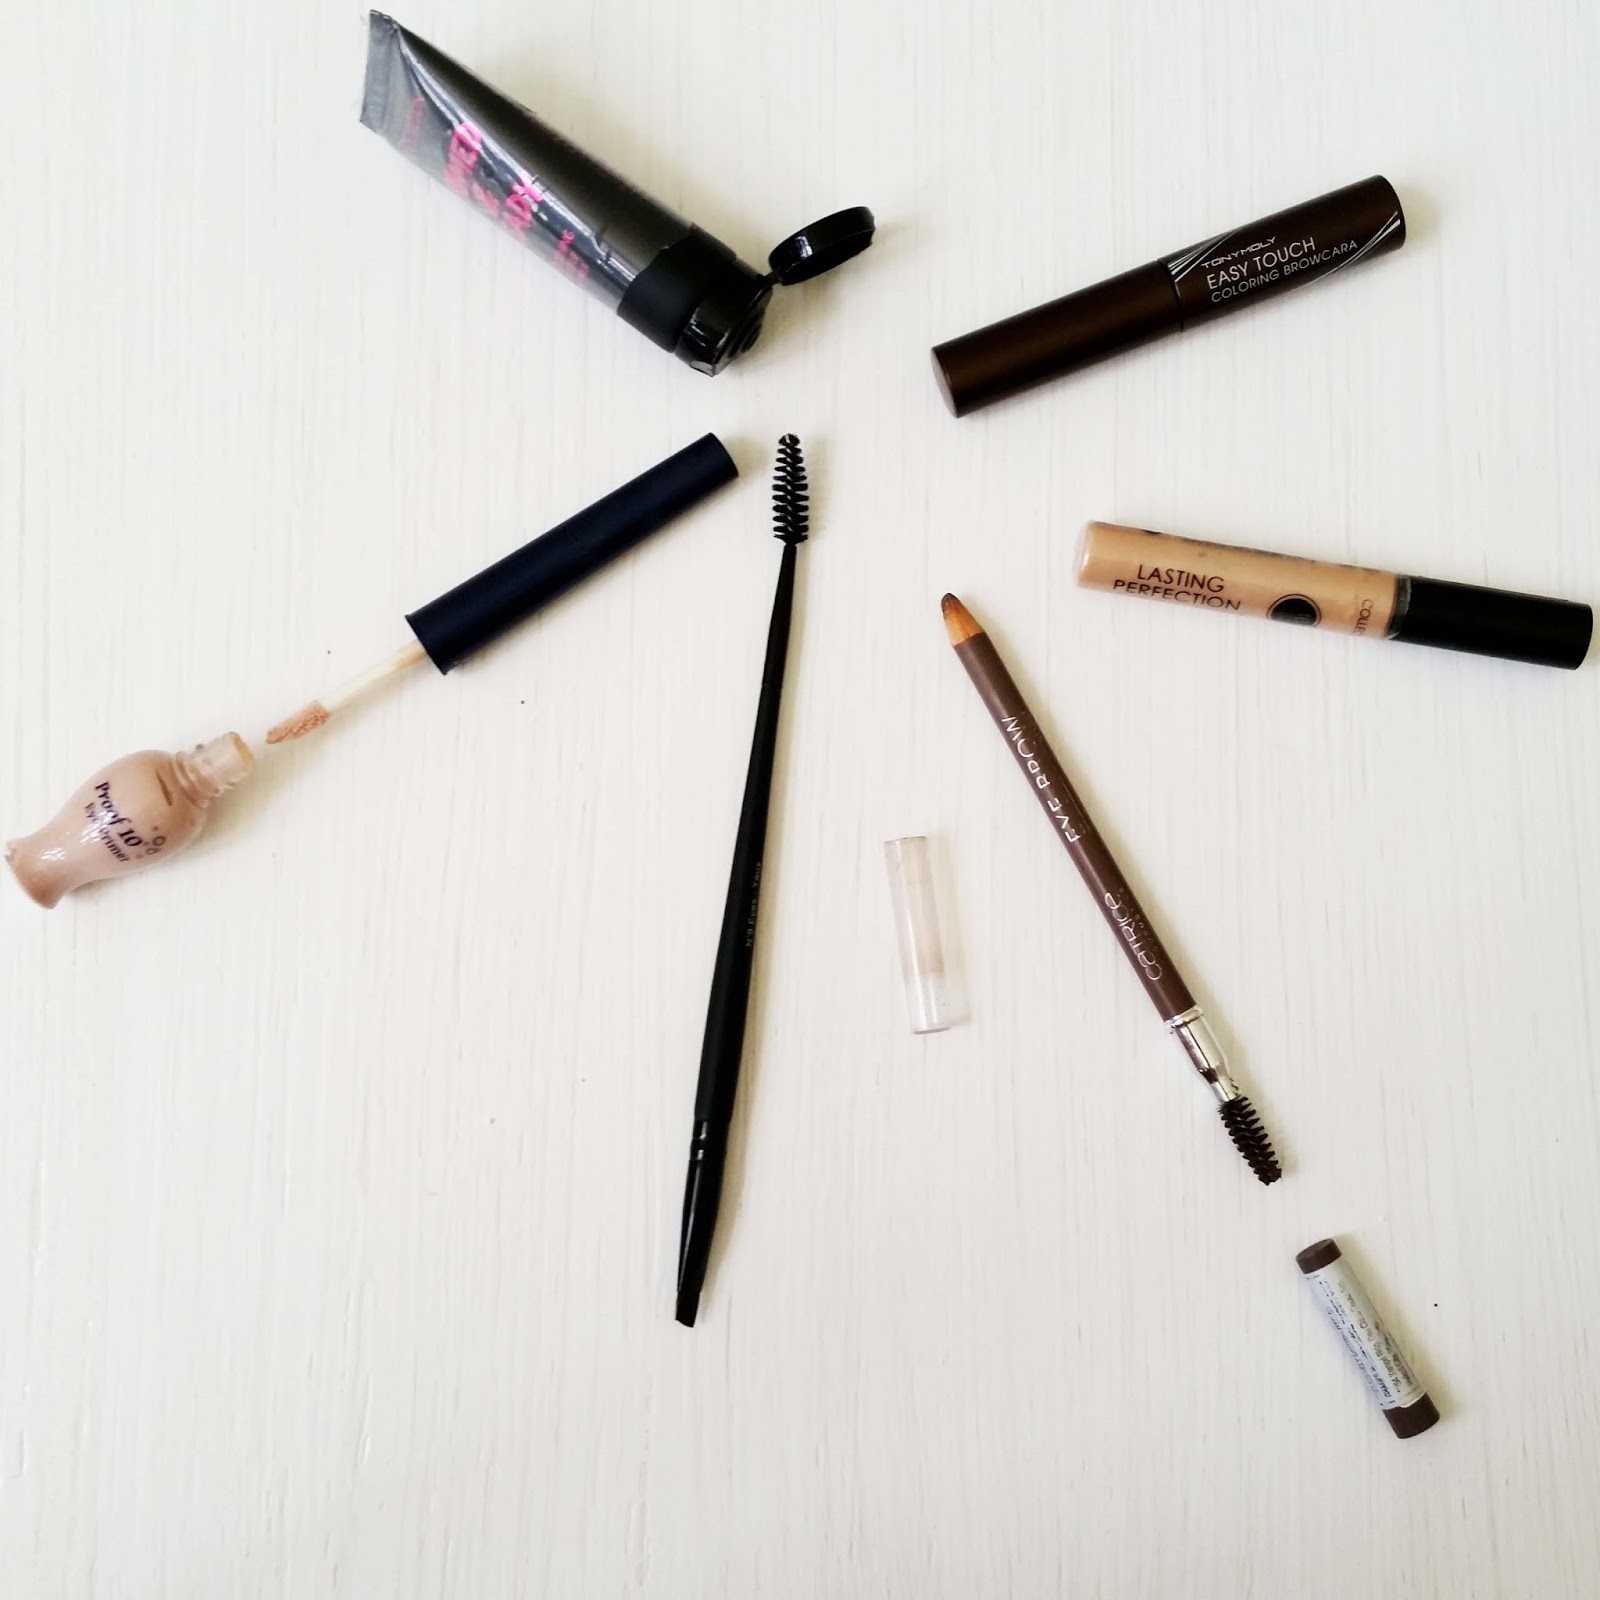
1.
Eyeshadow primer to make sure all those colors
stay put
2.
Eyebrow Pencil
3.
Concealer, better if it is a stick
4.
Browcara to keep all the strands in place and
match the color to my hair
And so here are the products I recommend you try in order to
shape your eyebrows, following all categories above which are the products I
use to keep my eyebrows neat and shapely.
STEP 1: PUT ON A PRIMER
Eyeshadow primer to make sure all those colors stay put. I have 2 recommended products for you:
1.
Etude Proof10 eye primer (PhP 298 at etude shops)
·
This can dry really fast so better spread it
along your eyebrows, just until the part you want to fill in with color. I have a dedicated blog about this product which you may click through this link.
2.
Collection Work the Colour Face Primer
·
This works just as fine with keeping eyebrow
makeup in place, and actually much easier to spread since it is a silicone-based
formula (PhP349 at the Landmark Mall)

STEP 2: DRAW THE OUTLINE OF YOUR BROWS
1.
Catrice eyebrow pencil PhP249 at SM Makati Makeup/Beauty Section
This is my favorite eyebrow pencil.
Not only is it a hard formula that stays put for hours, with or without primer,
but it is also the lightest shade of brownish gray that I can find in the
malls. The product also comes with a handy spooley at one end. The shade I love is called 08 Date with Ashton.

2.
E.L.F. Eyebrow fill PhP259.75
I had very high hopes for this
product. I mean can you imagine? An eyebrow filler and a

STEP 3: BRUSH YOUR BROWS

Using a spooley, or a mascara-like wand, brush your brows
from the outline you made, going inward. This should spread the color of the
eyebrow pencil you used. If you have a dark foundation, you may also use this
to fill in your brows and add more color, but I find that simply using a dry
formula, in this case, using an eyebrow pencil, gives a much better staying
power.
You may choose to build up the color using the eyebrow
pencil by drawing small lines along the growth of your eyebrow strands. This
will create the illusion of additional strands.
STEP 4: CONCEAL TO CREATE A CLEAN SHAPE,
OVER AND UNDER
For this step I use the Collection Work the Color Lasting Perfection Concealer (PhP 299 at the Landmark) and a stiff but soft, tiny precision brush. I tap the brush on the concealer
wand to get just a little amount, then apply this underneath my brows, thus
creating a nice, put together, clean shape. Some people swear that this step is
optional, but for me, it is non-negotiable. Just compare the difference between
the shape of your eyebrows with and without using a concealer underneath.
Unless you are aiming for the no makeup makeup look, or the bohemian/Coachella look
then by all means, skip this step. I personally like looking neat underneath my
brows, even if it only follows a straight Asian shape.
On the top edge of the brows: this is what’s optional for
me, because usually, I do not use a concealer anymore.


STEP 5: APPLY A BROWCARA

The product I absolutely love using to tame my brows and
keep them in place is the Tony Moly Browcara in Light Brown (PhP378). It is not the kind
of eyebrow mascara that you need to put a ton of, because you only need a few
strokes and your eyebrow stays in place. In fact, if you put more, and this is
what they call “overgelling”, the product will flake after 5 hours and you will
experience a lot of fall out.
I also love the Browcara because it comes in a light brown
shade which matches my hair color. I have always been having trouble looking
for a lighter shade of eyebrow pencil here in the Philippines, which usually
comes in dark colors. The Tony Moly Browcara gives my eyebrows a perfect finish
even if the pencil color I used is still darker than my expectations.
So there you have it guys, my go to products for keeping my eyebrows neat and straight ;)
No comments:
Post a Comment